Sunday, January 26, 2014

Importance of Good Notes

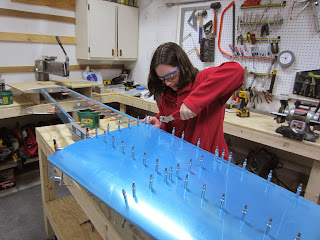
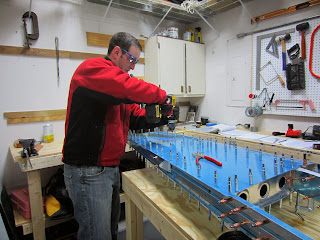
So I realized when getting ready to disassemble and deburr that I failed to match-drill the holes in the right-side HS nose rib; evidently I need to take better notes between sessions.
 Aside from match drilling those holes, I disassembled all parts, began deburring & dimpling.
 
I also spent some time on the shop - picked up a 27 gal air compressor to make riveting easier on the ears, and to support a potential paint sprayer or air drill.
Family movie time had us indoors, so I took the opportunity to sort & label some rivets & parts. As you can see, you can never have too many peanut butter or pickle jars!
The electrician's tray above worked great for the miscellaneous parts. Thanks, Dad!
 
Shop: 2.5 hrs
Empennage: 3 hrs

Sunday, January 19, 2014

EAA RV Assembly Workshop

 This weekend I had the pleasure to attend EAA's RV Assembly SportAir Workshop, hosted by Chapter 524 in Frederick, MD.
 
There was some academic instruction by the excellent Jack Dueck (who's book Sheet Metal Building Basics is excellent, as are his Hints for Homebuilders videos), followed by lots of hands-on time with 2 practice projects.
EAA, with the support of Vans Aircraft and Aircraft Spruce, provided tools, prints and practice kits. The tools were adequate, as to be expected with those used by dozens of unskilled novices. Materials were exactly the type I've encountered so far, and perfect for making mistakes.
 We 16 students paired off to work on our airfoils; Pat & I made good progress, learning about countersinking, back-riveting, pop-riveting, the importance of a good air compressor, and lots of practice with the rivet gun (and how easy it is to mangle aluminum!).
 
I can see the value of a high-speed air drill over the 20V Li-Ion I've been using (weight, speed), but it was hard to get a good feel with intermittent air available.
 
EAA Chapter 524 had 3-6 volunteers circulating throughout the weekend, answering questions, offering tips & encouragement. Their help was invaluable.
 
After we completed the airfoil, Jack reviewed our work and offered suggestions to improve as we dive into our airplanes.
All in all, the workshop was worth every penny. I highly encourage anyone interested in sheet metal work or building an airplane to try to attend.
 
Thanks to EAA, Vans, Jack, @ Chapter 524!

The mouths of babes

I set some tools on the counter last night to supplement my SportAir workshop tools today; 4 year old (N) walked by and said, "oh, Cleco pliers. Whatcha doin, dad?"

Then today:
Me to 2 year old: A, do you know what these are?
A: yah; Clecos [pliers]
Me: what do we use them for?
A: Cleeking.

Awesome. 

Family support

How do you get 3 girls interested in dirty, monotonous shop work?

Like this:

Thursday, January 2, 2014

You put your right skin on, you take your right skin off...

 I had some more time over the holidays, so we dug into more match drilling & deburring.
Got the HS-405 & HS-404 ribs drilled in.

It seems ridiculous talking about $35 in parts, but  I was terrified to drill the first holes. After a while I just grabbed a pair and did it, and the rest went much easier. 
The below joint was especially tricky, as I had to clamp it together & drill it in place. Right angle drills are recommended, though I found out they're the $300 custom variety, and not the Home Depot variety. My solution is farther down.
Got the skin match drilled!
Erin came out for her first session on Tuesday. She says she had fun!

So about that narrow-access solution? Found a low profile dentist's drill attachment for a dremel. 
The collet fit both #30 & #40 bits. I bought a dremel with only 2 speeds, so you could get one with more variability, but starting slow & sizing up with high speed worked well. I wouldn't want to do many, since it takes good control or a lot of jig building to stay straight, but it's the best commercial option I've found.
Happy new year! It meant more time for the plane. Erin continued match drilling skins on the left horizontal stabilizer, while I fitted ribs & match drilled the right.


Erin moved on to deburring; machine deburring outer holes is fine, but hand-twisting bits for the interior holes was a pain.
Oh yeah, all the warm clothes? Temps were in the 20s. Definitely need to get a couple propane bottles for the heater!

Yes, we're drilling & deburring these holes with cordless drills. The RPM on the 20V DeWalt are low, but effective. Eventually I will invest in a larger compressor and air drill, but it's hard to justify the extra $700 right now. Maybe with the wings....
We got the horizontal stabilizers all match-drilled, and almost half of the deburring done. Next up: priming, dimpling & driving those rivets!


Empennage: 7.5 hrs

Video take 2


2nd attempt at getting video to load...tried creating a private YouTube channel.